5 Reasons Why I NEVER Shoot in Auto Mode
I was one of “those people”. I bought a DSLR in the hopes that it would instantly take my photos to the next level. Yes, it did make my amateur “I took photography in high school so I have an eye for photography” shots look better, but I had no idea how much reviewing of basic photography and learning I had to do to really make use of my new piece of equipment. How naive of me to assume that just because I bought a better camera that my photos would look a hundred times better.
<
ISO, aperture, shutter speed, oh my! After much trial and error (I’m talking too many missed opportunities for incredible photos to count) I finally feel like I’m starting to settle in to how to use this incredible piece of equipment that I invested in. At first, it is a lot to think about. How much light do you have? Are you using natural or artificial light? Is the subject moving or still? How much of the background do you want in focus? Where do you want the focal point to be? It’s enough to make the average person want to say, “Screw it, I’m shooting in Auto.” I’m here to say, WAIT! STOP!
Even though it might seem overwhelming at first shooting in manual is the way to go, no doubt about it. Shooting in manual gives me total control over the shot. The more control over the shot that I have, the less post-editing that I have to do. The less post-editing that I have to do, the less time I have to spend on my photos for my blog. And, the more control I have over the shot the less post-shot regret I have. I could talk about photography for hours but for today, I’m going to sum up what I love most about shooting in manual mode in a few short sentences. Big thanks to the cast of “Yo Gabba Gabba” for helping me out with the example shots.
*all of the below photos are SOOC with no editing

No more blurry faces
I know that when taking a group shot, everyone’s face will be in focus. I’ve taken a gamble before when having someone else use my camera to take a group shot and left it on AUTO for simplicity’s sake. After half of the group who didn’t happen to be on the same plane had blurry faces, I’ll never make that mistake again. You can see that the flash popped up for the AUTO shot, and Plex and Toodee are still slightly blurry compared to the others. I shot the MANUAL photo at f/5.
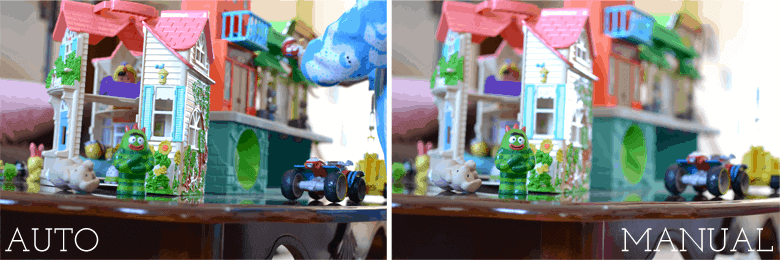
A nice, blurry, bokeh background
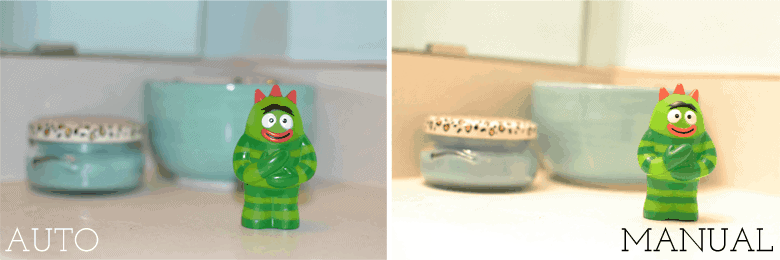
I know that when taking a portrait, the background will have a nice bokeh affect bringing attention to the subject. I am a sucker for blur and bokeh. I will admit, it’s probably the biggest reason why I bought a DSLR and a spendy lens. If you don’t tell your camera how much to put into focus, it’s going to do whatever it wants. And, most times, the flash is going to pop up and everything will be in focus with a bunch of harsh shadows. The light in my house was pretty good so the flash didn’t pop up, but you can see in the AUTO shot that it picked the house to focus on instead of Brobee like I had intended.
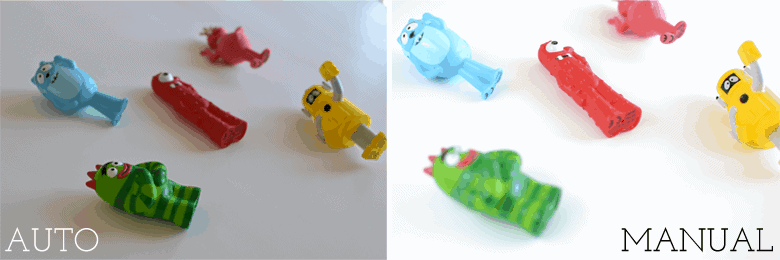
Crisp, bright white backgrounds
If I’m shooting on a white background for DIY tutorials, I can make sure it’s bright. I recently started shooting my tutorials with a white background. I couldn’t figure out why, even though I was metering at zero, my background still looked gray. I tried using several different white balance settings, and still gray. Then, I adjusted my meter to slightly overexpose, and tah-dah, no more gray.
Defined and in-focus shots
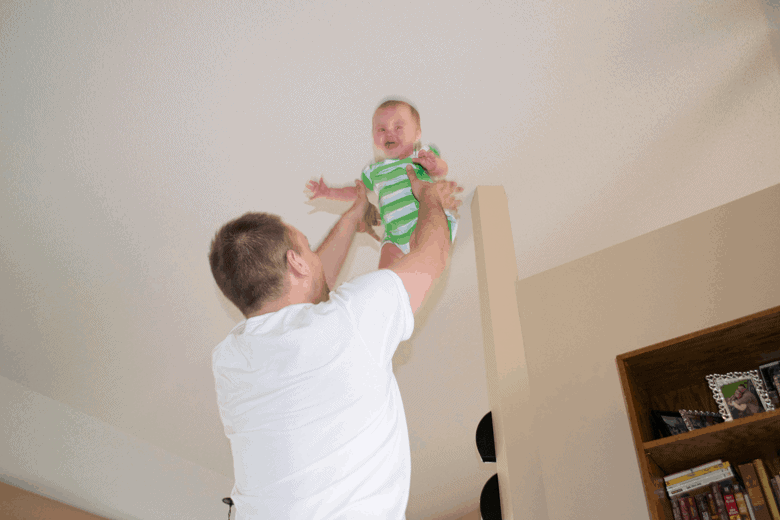
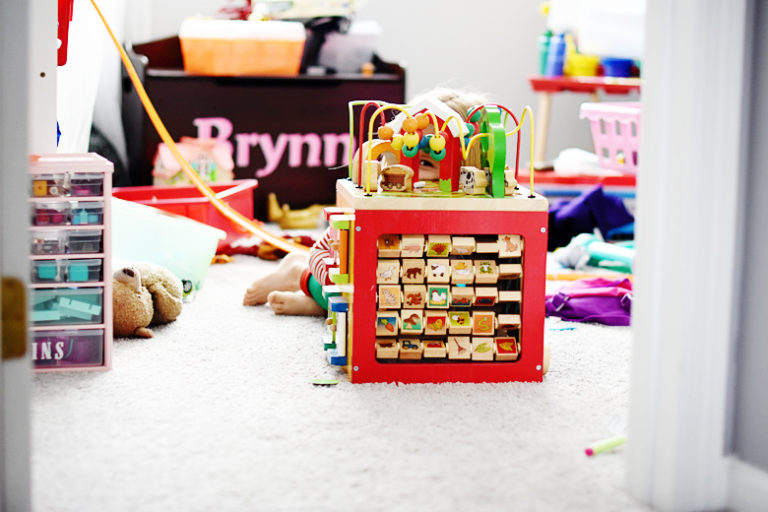
That’s easily one of the worst photos I have EVER taken, from back in the early days of my DSLR (shudder). If I’m taking photos of Bean in action, I can make sure she’s not blurry with a fast shutter speed. I once heard that when shooting kids in natural light, your shutter speed should be no slower than 1/250. I keep that in mind and try to aim for that and adjust my aperture as needed.
No need for flash in low-light
Brobee and I headed to the place where light goes to die in my house, the bathroom! If I’m taking photos in low light I can crank up the ISO as high as I need/want to. Granted, the higher the ISO the more noise or graininess, but if you’re in a spot where lighting is minimal you can still get a good shot without using a flash if your ISO is high enough. If I was more serious about the above photo, I would have also done a tad bit more with the white balance to get rid of the golden color that the bathroom lights cast.
I’ve finally fallen into my photography rhythm through 3 years of trial and error. I could have saved myself so many disappointing shots if I had known about Clickin Moms. I’m learning so much that I never knew before about reading histograms, how to properly compose a portrait, metering modes. I’m learning that it’s not just about ISO, aperture, and shutter speed if you really want a good photo.
Plus, Clickin Moms has a forum where you can get feedback on your photos, learn valuable tips and tricks, take photo quizzes, and so much more.
Clickin Moms is a members-only community of over 16,000 photographers who are passionate about capturing their lives, their clients, their families, and their worlds more beautifully. For many members, Clickin Moms is an online home for business networking and development, artistic growth, technical knowledge and support, and deeply held friendships. Clickin Moms strives to empower photographers of all levels to capture life beautifully in both their personal and professional endeavors, to make flexible, quality photography education and mentoring accessible, and to maintain a supportive community for continuous learning, sharing, and growth. Clickin Moms offers a 30 day refund guarantee, so you have nothing to lose.
Clickin Moms is generously giving away a year-long membership! You can also get 20% off an annual membership with the code BrePea20 until March 13th, 2015.
Open to anyone 18+
Ends at 11:59pm CST on Friday, March 20th 2015
I was given a complimentary one-year Clickin Moms membership in exchange for this post. All opinions expressed are my own.

I also noticed a massive shift when I went onto the manual options… I find that when I'm shooting kids – I prefer the P Mode… It's somewhere between auto and manual. The other BIGGEST difference that REALLY changed the way that I photographed kids… was to get a lens fast enough to capture fast moving nunus in lowlight… I got the 50mmf1.4 – but the 1.8 is just as good [and more reasonable]… it helps get rid of blur… and help with capturing the shot [without having to crank up that iso] 😉
I think P Mode is Canon's version of Aperture Priority. That's definitely helpful when shooting kids, there's just not enough time to adjust all of those settings in manual when they're moving around! And I TOTALLY agree about the lens! I have a 35mm f1.8 and it made all the difference in the world.
Hey Bre… The “P” mode [I think it's both Canon an Nikon] is Programmed Auto – and it works with the shutter speed and Apeture… and is a bit more creative than Auto – but not as tricky [settings wise] than Manual – and has saved me on a few occasions… Isn't a prime lens just so awesome! A 35mm/24mm is my next acquisition and need!
Ah, gotcha. You're gonna love the 35mm if you get one! It doesn't crop out as much as the 50mm does!
I'm looking forward to taking amazing pictures of my family. I would love to be able to get ideas and tips from others.
You have been so awesome in tweeting about the giveaway, I think you've got a strong chance of winning!
I am a photography instructor.
I often use ‘P-mode’ probably more than 50% when I take a picture of not moving items. But when I take a picture of moving items such as jet planes or racing cars, I manually set shutter speed and aperture size with auto ISO setting. I always use RAW mode so that it is necessary to develop the pictures I took.
As a conclusion, I think it depends on the situation.